How to Deploy a Java Application
In this article, we will show you how to deploy your Java web project to our cloud platform.
Precondition:
An FTP client like FileZilla client has been installed on your local PC;
A Java web project on your local PC;
You have a JavaPaaS service installed;
1. Transfer your Java project to the Cloud Clusters platform
Please refer to Transferring Data via FTPS to upload your Java project to the Cloud Clusters platform.
Note: The target directory for uploads should be /cloudclusters/apps.
In this example, we will upload a JAR file named test.jar to the /cloudclusters/apps directory.

2. Add a web service in the Control panel
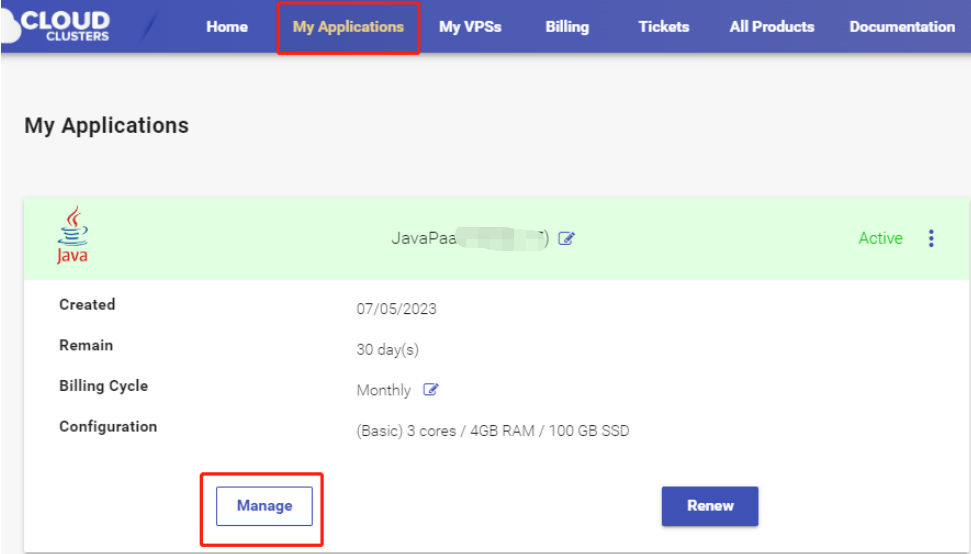
Locate your target application on the My Applications page, and click the Manage button.

Then, click the “Deployment” tab.

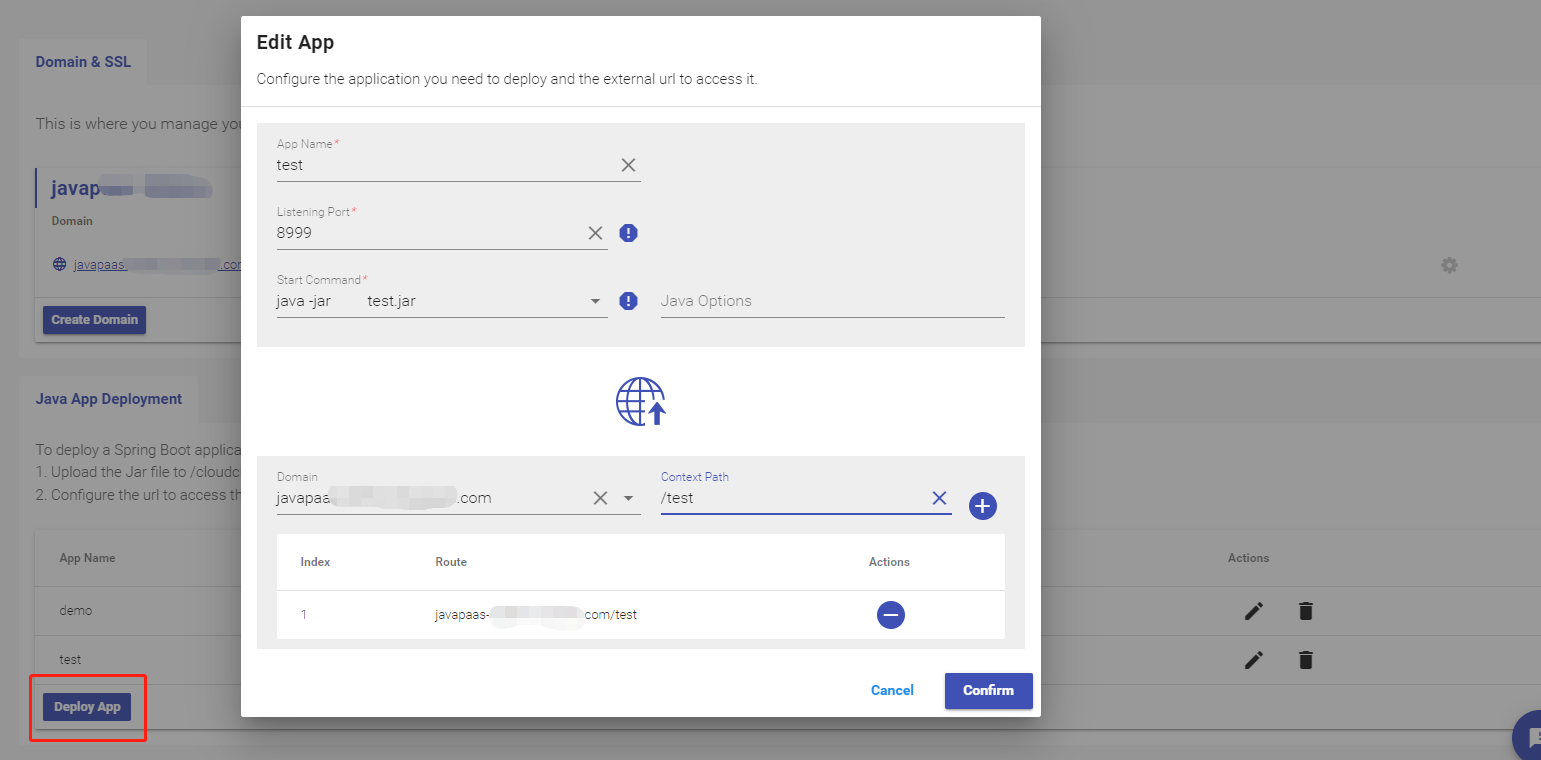
Scroll down to the Java App Deployment section and click Deploy App, followed by inputting the required information.
- App Name: any name will work.
- Port: the process/service listening port (The listening port must be the same as the one used by your code)
- Start Command: java -jar
#Please replace the file name with the one you uploaded to the app directory in the last step. - Domain: Choose the domain name. It could be the default domain or the custom one you newly created.
- Context Path: Specify a path.

Here you can see the web service has been added.

3. Check if your Java web project works in web shell
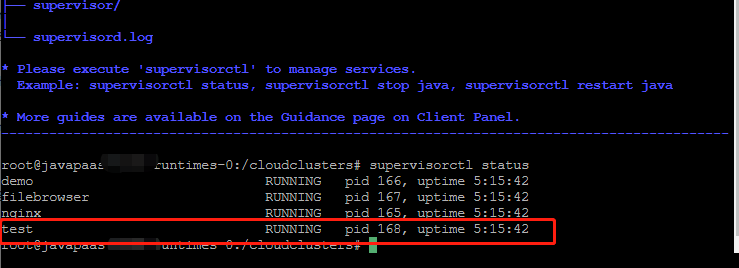
Go to the Shell/SSH tab and initiate a shell session.

Use the command to check if the Jave web project is running.
supervisorctl status

4. Check if your Java project works in a browser

That's it! You've added your Java project to our platform successfully! If you need further assistance, feel free to contact us for technical support.